Difference between revisions of "RGB-Pi SCART Installation"
(Prepared the page for translation) |
|||
| Line 1: | Line 1: | ||
| + | <languages/> | ||
| + | <translate> | ||
'''Steps''' | '''Steps''' | ||
| Line 9: | Line 11: | ||
[[File:Psu2.png|320px|border]] | [[File:Psu2.png|320px|border]] | ||
|- | |- | ||
| − | |3. That's all! For instructions on how to install RGB-Pi OS, please visit [[OS_Installation|OS Installation]] | + | |3. That's all! For instructions on how to install RGB-Pi OS, please visit [[Special:MyLanguage/OS_Installation|OS Installation]] |
|- | |- | ||
|} | |} | ||
| + | </translate> | ||
Revision as of 19:13, 18 June 2021
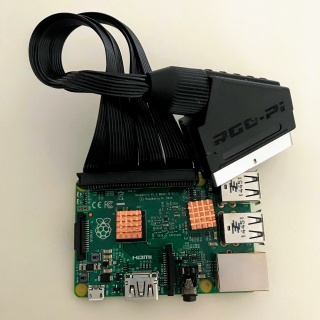
Steps
| 1. Connect the cable to the GPIO. The cable must be facing to the outside of the Raspberry Pi |
| 2. We recommend the use of this power supply as the only one with RGB-Pi approval to avoid undervoltages and slowdowns because supply 5.25v, If you are from UE, need one plug converter too. |
| 3. That's all! For instructions on how to install RGB-Pi OS, please visit OS Installation |

