Difference between revisions of "RGB-Pi SCART Installation"
| Line 6: | Line 6: | ||
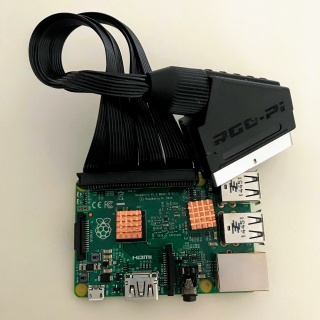
[[File:cable.jpg|320px|border]] | [[File:cable.jpg|320px|border]] | ||
|- | |- | ||
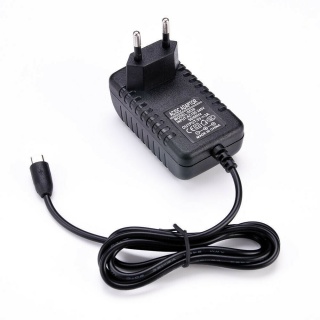
| − | |2. That's all! For instructions on how to install RGB-Pi OS, please visit the corresponding section in [[OS_Installation|this wiki]]. | + | |2. We recommend the use of [https://www.ebay.es/itm/3A-5V-Micro-USB-AC-Adapter-DC-Wall-Power-Supply-Charger-for-Raspberry-Pi-Switch/382839263391?ssPageName=STRK%3AMEBIDX%3AIT&var=651535380284&_trksid=p2057872.m2749.l2649 this power supply ]as the only one with RGB-Pi approval to avoid low voltages and slowdowns. |
| + | [[File:psu.jpg|320px|border]] | ||
| + | |- | ||
| + | |3. That's all! For instructions on how to install RGB-Pi OS, please visit the corresponding section in [[OS_Installation|this wiki]]. | ||
|- | |- | ||
|} | |} | ||
Revision as of 14:14, 8 May 2020
Steps
| 1. Connect the cable to the GPIO. The cable must be facing to the outside of the Raspberry Pi |
| 2. We recommend the use of this power supply as the only one with RGB-Pi approval to avoid low voltages and slowdowns. |
| 3. That's all! For instructions on how to install RGB-Pi OS, please visit the corresponding section in this wiki. |

